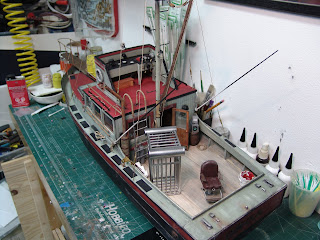
Sunday, December 6, 2009
Saturday, November 28, 2009
A Few More Pics
http://cgi.ebay.com/Orca-Model-Boat-from-Jaws_W0QQitemZ280430645908QQcmdZViewItemQQptZLH_DefaultDomain_0?hash=item414af81294
Tuesday, September 8, 2009
Tuesday, August 25, 2009
A Boat-load of Accessories
Sunday, August 9, 2009
Unimat
Just to go off topic for a moment if you go over to Sherline's site you can have a look at their online museum (http://www.craftsmanshipmuseum.com/). This is by far the greatest collection of miniatures I have seen. The work displayed there is simply breath taking.
Ok, back to the lathe. On the boat there are a couple of baseball bats (actually clubs) so I thought this would be a great opportunity to try out the lathe. It took some patience but I think it came out pretty good.
Thursday, July 30, 2009
It's all in the details...
Typically for styrene I use Tenex7R but I figured I would give the Micro Mark equivalent a try. I have to say I really like this glue. You do have to be careful because it is really potent and can melt away your precious details if you aren't careful.
After construction was complete I hit the cage with a light coat of Primer.One of the best paints to give you a metal-like finish is Alclad II. I've been using this stuff for years and it gives a really professional finish to your work.
You start by base coating the piece with Gloss Black. Alclad has a base coat they make for this but any gloss black paint will do.
After that dries you spray and I repeat spray on light coats of the metal paint. In order to get a really nice finish you have to use an airbrush with this stuff.
Friday, May 29, 2009
Casting the Barrels
Before I can fill the mold with resin I need to prep it. To start I dust the inside of the mold with some baby powder and blow away the excess with an air can. I then put the silicone back into the mother mold and carefully re-align the seam. There is no need to use a mold release as the resin removes easily from the silicone.

After propping up the mold I prepare the resin. For the barrels I am using Smooth-On's "Smoothcast 300" resin. It is mixed 1:1 by volume and is really easy to use.
I mixed up both parts and slowly pour the resin into the mold. In order to assure that there were no air bubbles trapped I lightly tapped the mold before the resin set up. This resin takes about 5 minutes to set and about 30 - 40 mins to fully cure.
After about 30 minutes I removed the resin from the mold and have a perfect replica of the original.
Sunday, April 26, 2009
Barrels, Barrels, Barrels
Let's get started with the barrels. I started with a block of balsa wood and turned it in a lathe to a barrel shape. From there I coated the balsa in Aero Gloss Dope. This really helps seal the wood. When I was happy with the shape and look of the barrel I sprayed it with primer.
Now this is where Smooth-On comes into the picture. I wasn't going to make five separate barrels so I planned on making a master and molding the rest. To begin I glued the barrel on a piece of foam core. This is a base for the mold. In the past I have tried a few different silicones to make molds but this time I thought I would try Smooth-On's "ooMoo" - yes, that's what it's called. It is very simple to use and is a two-part silicone which you mix in a 1:1 ratio. After mixing the two parts together I began covering the barrel. At first I stippled the silicone over the barrel with a 1" chip brush then I slowly poured it over the top and let it drip down. With a craft stick I then made sure it was covered on all four sides. This silicone takes about 75 minutes to cure but it begins to setup in about 10 minutes so you have to work relatively quick.
The silicone is not stiff enough to cast as it is so there is a need to make a mother mold. I chose to make it from plaster bandages. Now that the silicone has cured (I left it overnight) I make a dividing wall down the center with plasticine clay. I then cover one half of the mold in plaster bandages and let that setup. This takes about 30 minutes. Now it's time to cover the other side but first I have to make sure the plaster bandages don't stick together. I remove the plasticine clay and then coat the plaster with vaseline on any surface that the new plaster will come in contact with it. As I did before I cover the other side and let the plaster bandages setup.
When everything is dry I crack open the plaster mother mold with a screw driver.
NEXT POST: CASTING THE BARRELS IN RESIN


